 |
| You can copy & paste the photo, and then copy & paste THIS URL. |
Do I EVER love the stitches I tried this week! I flipped through a bunch of embroidery books and chose the Herringbone Stitch. You make it by doing a sort of backstitch, except that each stitch you take is apart from the last. See?
Check this out. If you draw or imagine a leaf outline, you can fill it in with close Herringbone Stitches! I love that woven look, and prefer it to a satin stitched leaf. Isn't it cool!?
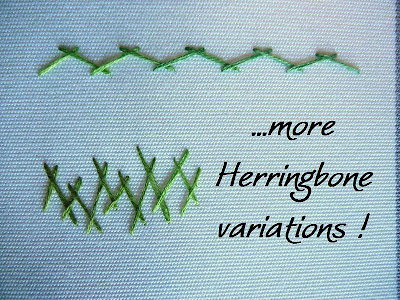
Then I played around with altering the stitches: a low, elongated stitch, and then a free form stitch I often see as grass in embroidered pieces. It's all done with that same back-stitch motion as the first Herringbone example.
I love everything in this next photo. I took a second variegated thread color and added to some of the existing stitch samples.
Did you look closely at the double Herringbone? What a great effect when you weave it.
I was asked if I would keep all my samples & put them in a reference book. You bet! If you are stitching along with me, you can do the same. Before I know it, I'll have a great collection I think.
Happy stitching!


4 comments:
I love the herringbone stitch and it really looks great in the leaf and I also like it in the freeform , would be great for grasses.Enjoying your embroidery.
These are really lovely stitches - your work always looks so neat.
I think it would be a great idea to print all of these lessons into a book. Thanks for sharing it all with us. :)
Thanks for showing how to use the heringbone stitch in different ways. I really like the two colours. I am practicing some now. Blessings: Dianne...
Oh, I really like how you used it to make that leaf! And the random on is nice too. Fun project you have going on here... lots of freedom to play :)
Post a Comment